Kernel Injection code by reversing Sirifef aka max++ infamous rootkit
Kernel-Mode Injection
Sirifef aka max++ was in its days, one of the most sophisticated rootkits ever created for Windows operating systems. I am presenting the reversed code found in its main driver (the main driver used for the device creation and dll injection) and introducing better modifications.

As we can see Sirifef registers an Image loading notification through PsSetLoadImageNotifyRoutine, then creates the device, deletes it with ObMakeTemporaryObject but its still capable of receving usermode data.

Inside the notifyroutine, authors first compare the strings with RtlEqualUnicodeString. If the systems loads the module mswsock.dll, then execution inside the function continues. We know the module name because of the definitions

Next step for Sirifef is to allocate memory for the KeInitializeApc and KeInsertQueueApc first parameter, which is PKAPC variable. So line 19 code turns out to be
KAPC *Alloc=(KAPC*)ExAllocatePool(NonPagedPool,sizeof(KAPC)
Passes the address of the loaded module to a PVOID value and uses the current thread to initialize the Apc. Calls KeInitializeApc and KeInsertQueueApc with OriginalApcEnvironment as third parameter.
What does exactly APC mean ? APC stands for Asynchronous Procedure Call, which is a function that executes asynchronously in the context of a particular thread. When an APC is queued to a thread, the system issues a software interrupt, so by the next time the thread is scheduled, it will run the APC function. If we want to inject to a usermode process that menas the thread needs to be in alertable state, otherwise injection wont take place.
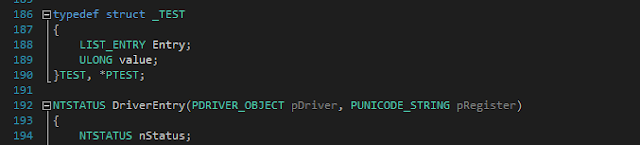
With this reversed code in hand, we can code our dll injector driver. We can start by defining some basic data structures used through the entrire code.

We will start registering an image loading notification routine inside DriverEntry.

Inside the notification routine the steps produced are:
1) First check that the ImageName which is a pointer to an UNICODE_STRING structure is not 0
2) Check that the string kernel32.dll exists, since we will be injecting our dll code only when system loads kernel32.dll module.
3) Hash variable its actually a global variable (in real production malware this would be change) defined like this GET_ADDRESS Hash.
4) If the kernel32dll value is zero, that means it has not loaded yet, so we enter the conditional, pass the memory from the loaded module by the notification (kernel32.dll) and load the LoadLibraryExA function using the ResolveDynamicImport which can be found in the ZeroBank rootkit series.
5) Next step is to allocate memory for an KAPC variable
6) Initialize the Apc with KeInitializeApc using the current thread and introducing the function APCInjectorRoutine, the processor mode is kernelmode.
7) Insert the Apc with KeInsertQueueApc
5) Next step is to allocate memory for an KAPC variable
6) Initialize the Apc with KeInitializeApc using the current thread and introducing the function APCInjectorRoutine, the processor mode is kernelmode.
7) Insert the Apc with KeInsertQueueApc

The APCInjectorRoutine Initializes the SIRIFEF_INJECTION_DATA structure and frees the apc value everytime its called.
1) Pass the current thread memory to the structure
2) Pass the the current process to the structure
3) Pass the current process id to the structure
4) Initialize the notification event
5) Initialize the WorkItem, queue the work item with type DelayedWorkItem
6) Wait for the event object
The SirifefWorkerRoutine is the function that the Work Item will trigger everytime it gets called. It performs the actual injection of the dll to the current process id
For simplicity we create another function which its called DllInject, we pass the following parameters, the current process id, the current process and the current thread.

Finally the process injection function. What we do is the following:
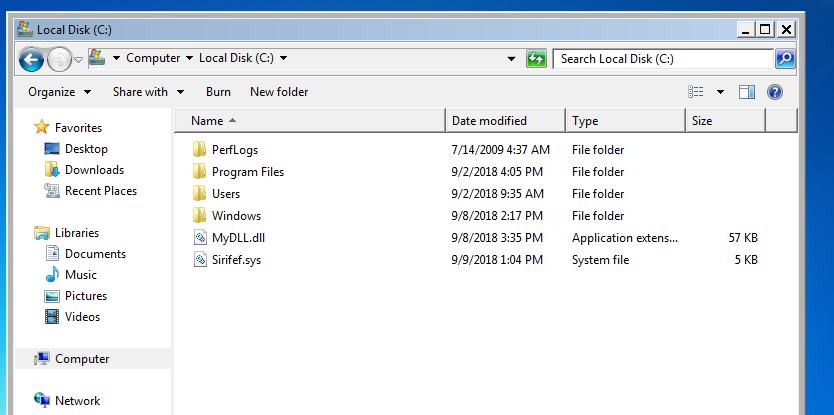
1) define our dll path: ''C:\\MyDLL.dll" in the sample
2) get the size in bytes of the string
3) open the target process using the id that we gather before
4) Allocate memory on the target process calling ZwAllocateVirtualMemory with the bytes of the string as the size for the allocation.
5) KeStackAttachProcess which attaches the current thread to the target process address space
6) Copy the string to the previously allocated memory
7) KeUnstackDetachProcess which detaches the current thread and restores the old attach state.
8) Allocate memory again for an KAPC variable
9) Initialize the APC inserting the address of the stub LoadLibraryExA and the allocated memory which contains the path of the dll
10) Insert the APC

The APCKernelRoutine frees the allocated Apc value.

Lets see the injector driver in action
The LoadImageNotifyRoutine gets triggered. We can see that system has loaded kernel32.dll which matches with our target string

The first function that gets triggered in the image notification. We check the structure and see that all variables are filled with data.

If we want to know the process name we simply check the _EPROCESS data structure. The process name is calc.exe as the field ImageFileName tell us.

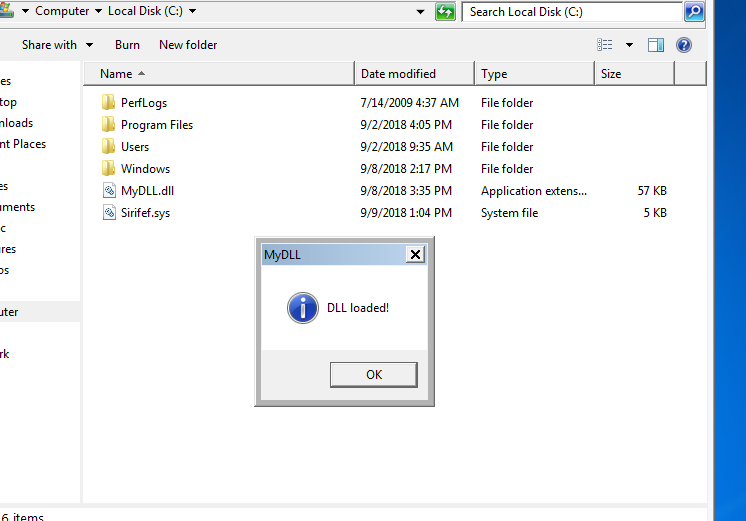
We can see that the dll is successfully injected into the target process (calc.exe)

After closing calc.exe the dll detaches from the target process

Just a quick summary of whole injection process:
1) Driver gets loaded, registers an image notification routine.
2) If system loads kernel32.dll module the notification routine obtains the LoadLibraryExA stub address
3) Initializes and Inserts the allocated KAPC variable with kernel-mode processor mode. Triggers the APCInjectorRoutine
4) APCInjectorRoutine Initializes the global variable Sf which belongs to the SIRIFEF_INJECTION_DATA data structure. Passes memory , current thread, current process and process id.
5) Initializes an event object
6) Initializes a WorkItem routine -> delays the queue work
7) WorkItem routine is the one who performs the injection -> open target process, allocate virtual memory -> allocates KAPC variable -> Initializes and Inserts APC with user-mode processor mode
8) Dll gets injected into target process
Hi, how to explain .sys file? can you tell me the tools? thank you
ReplyDeleteHi, IMO the best tool in Windows OSes for disassemble binary files is IDA Pro Hex Rays. For the ZeroAccess rootkit driver i used the 6.8 version. You can find newer version online
DeleteI HAVE SOME QUESTIONS !!
ReplyDeleteI read everything but hard to understand how a driver can injection is in the process "IN THIS CODE"
There is no in sirifef [ (* .exe) file for example ]
1 ) What do I do to enable the driver to understand that this is the required operation
I don't have experience in reverse engineering
2 ) How do I operate this driver?
I cannot do sc start
Please tell me soon and thank you